As with the last post, this one will cover the results of our fight. If you haven’t seen Bombshell Vs. Cobalt yet you can view it in full here:
Pre-Fight Activities
While we may have lost the fight with Complete Control the damage was quickly repaired. This allowed us to move on to preparing our Adjustable Height Horizontal Spinner Module for action. The big task with this configuration was to get it driving as well as possible on the BattleBox floor. The unusual weapon layout meant that the center of gravity was actually forward of our front wheels, which as you may expect resulted in a rather difficult to drive bot. We spent a good bit of time fine tuning our outriggers with an angle grinder to minimize the chances of us getting in a spot where our rear wheels and the outriggers were keeping the front wheels off the ground. We also kept up preparation/fine tuning activities with our other weapons to keep the Cobalt team guessing as to exactly what they’d be fighting.
It took a good deal of time to get the outriggers set up right, and even then we were not thrilled with how the weight balance was. Luckily the AHHS Module was not our heaviest weapon so we had some weight margin to add ballast to the rear of the bot. Adding ballast consisted of melting a lead hammer into the back corner of our wheel guards and running a bolt through both to help retain the solidified lead lump. (Special thanks to Rob Masek from the Lucky team for the hammer “loan”)
With that detail sorted we were ready to fight.
Strategy
There wasn’t any doubt which weapon we were going with for this fight. The AHHS Module was designed as a non-wedge means of combating powerful horizontal spinners. The height adjustment allows us to target fragile components at a range of heights during a fight, effectively functioning as a 42″ scalpel.
Our goal in this fight was simple: Get the bar lined up with Cobalts weapon chain and break it.
Post-Fight Analysis
After seeing the Cobalt team having a strategy session with another team prior to the fight I knew there was a decent chance they’d have an approach that was a bit more complex than run straight at us with their weapon bar. Once the fight started, my suspicions were confirmed. Instead of leading with the bar they were backing into our bar, trying to either stop it or destabilize us to the point where they could whip around and take a huge chunk out of our armor. Overall, a pretty solid strategy that easily could have worked out well for them.
What I don’t think either team expected was that Bombshells bar would skip up their wedge and drop down onto their top armor pulling massive chunks out of their wheels. As soon as I realized what was happening the plan shifted from going for the chain to trying to keep chunking their wheels. This continued for a bit until Cobalt stopped. Part way through the count they started moving again and one of the last hits finished off most of the screws holding their top armor on which made it possible for us to bury the bar deep into their chassis, hitting the shaft on their brand new weapon motor.
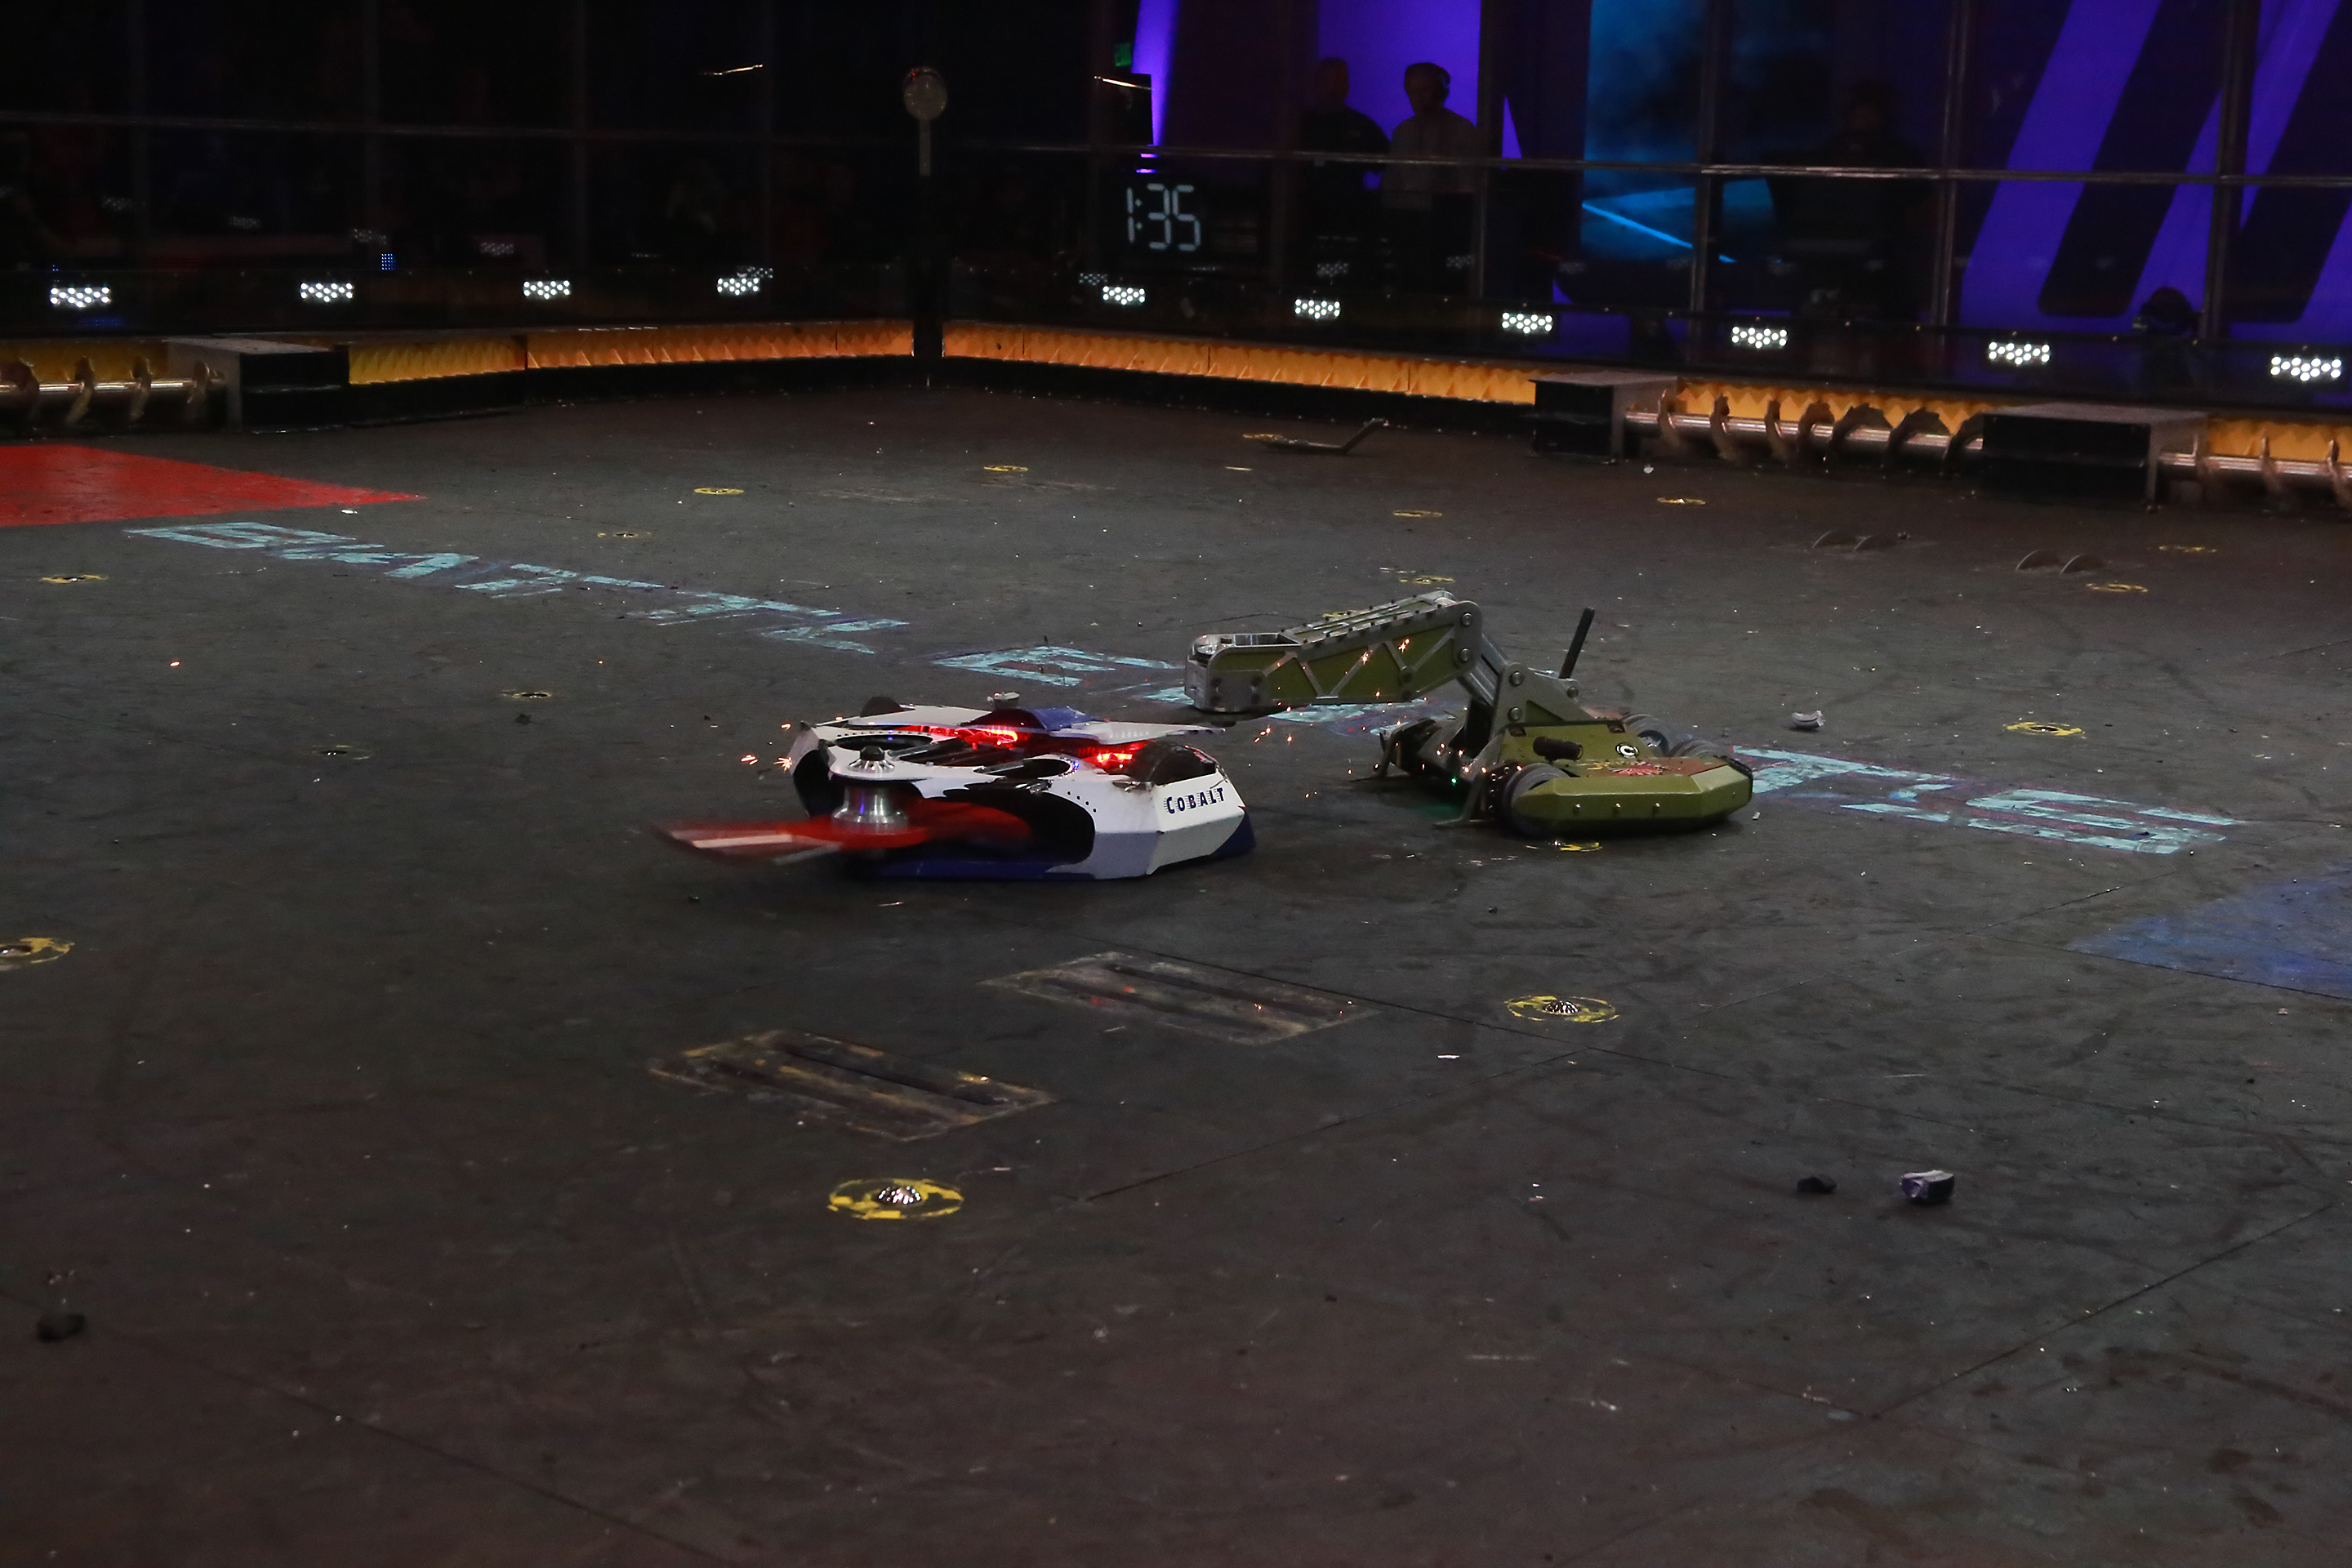
We didn’t make it out of the fight unscathed, as we had to replace a drive motor, the outer frame rail for a wheel pod, a few wheels, and our wheel guard due to damage taken during the fight. Luckily the design of the bot allowed these parts to be swapped fairly quickly and once again we were able to turn things around for the next fight without cutting it terrible close.
Up next, we take on Red Devil, a bot which took out its last opponent by cutting directly into one of their batteries and flipping it over.